How to make more money at a nail salon
Raise dollars per chair-hour. Name a print add-on, price it $25–$45, and stop giving custom art away. Only official O'2Nails distributor for Canada and the USA. V11 $2,999 CAD. X12.5 $5,999 CAD.
Full salon-money guide · Official distributor
How to Make More Money at a Nail Salon · 12 Ways to Increase Nail Salon Revenue · Is a Nail Salon Profitable

How to make more money at a nail salon — add a print service is last week's hours and a named $25–$45 print add-on, not a leftover brochure slogan. Only official O'2Nails distributor for Canada and the USA. V11 $2,999 CAD. X12.5 $5,999 CAD. 90-day trial.
Why add a named print service
How to make more money at a nail salon is last week's hours and a named $25–$45 print add-on, not a leftover brochure slogan. Only official O'2Nails distributor for Canada and the USA. V11 $2,999 CAD. X12.5 $5,999 CAD. 90-day trial.
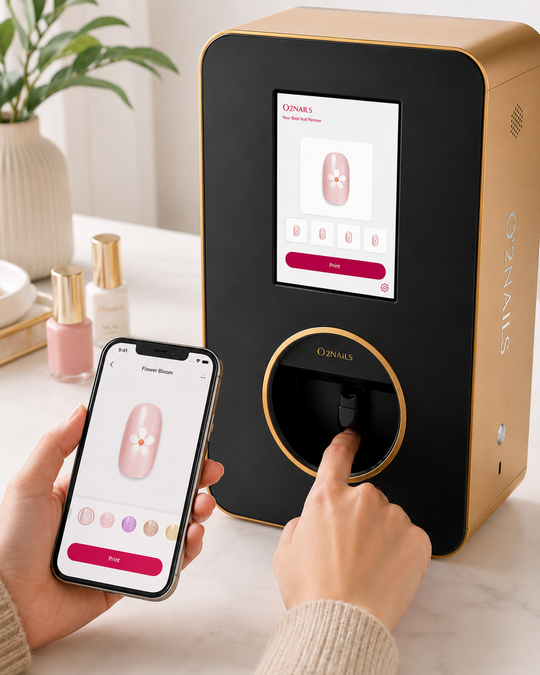
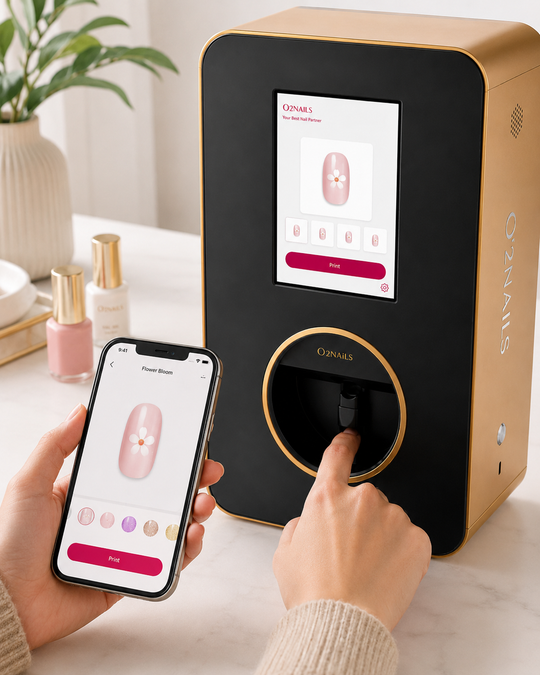
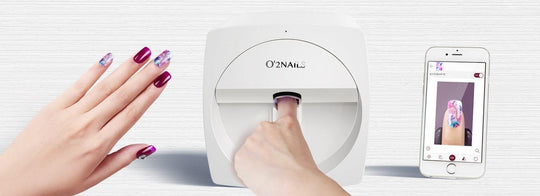
The economics are the reason this works. A traditional hand-painted complex design takes 15–30 minutes per hand of skilled tech time — time that could otherwise serve a paying client. An O'2Nails printer prints a full hand in about 5 minutes. That recovered tech-time is the first revenue lever. The second is the upcharge: clients reliably pay a $25–$45 premium for a printed nail-art set vs. a plain manicure, because the result is a fully custom design they can't get next door. Run the actual numbers for your salon on the ROI calculator.
Which Printer Should a New-to-Nail-Art Salon Buy First?
Most salons launching a nail-art tier start with the O'2Nails V11 ($2,999) — fast enough for a busy chair, durable enough for daily use, and app-controlled so any tech can run it without hand-painting skill.
Quick-pick by salon size:
| Salon Profile | Printer | Why |
|---|---|---|
| 1–2 chair small salon | V11 ($2,999) | Compact, app-controlled, low per-set consumable cost |
| 3–5 chair busy salon | V11 ($2,999) | Standard salon workhorse — high throughput, durable |
| 5+ chair / multi-chair operation | X12.5 ($5,999) | Built-in touchscreen lets clients browse designs while tech preps cuticles |
| Destination / flagship nail bar | X12.5 ($5,999) | 100+ sets/day, faster print, premium build |
Note on older models: earlier guides referenced the O'2Nails M1, H1, V12, X11 and X11 Plus. Those models have been discontinued and are no longer sold. The V11 is the current compact/entry machine that replaces them, and the X12.5 is the current flagship for high-volume operations.
Most salons over-think this and under-buy. The reverse is also true: buying the X12.5 for a 2-chair salon ties up capital in throughput you won't use, when the V11 handles that volume comfortably. Match the printer to your actual daily volume — the ROI calculator will show you the difference side by side.
How to price a named print add-on
The standard three-tier menu most successful salons run is: $25 express add-on (single accent design on existing manicure), $55 full art set (10-nail printed design with base + cure), and $95 premium custom (10-nail bespoke design uploaded by the client).
How to make more money at a nail salon — add a print service is last week's hours and a named $25–$45 print add-on, not a leftover brochure slogan. Only official O'2Nails distributor for Canada and the USA. V11 $2,999 CAD. X12.5 $5,999 CAD. 90-day trial.
What Equipment Do I Need Beyond the Printer?
How to make more money at a nail salon is last week's hours and a named $25–$45 print add-on, not a leftover brochure slogan. Only official O'2Nails distributor for Canada and the USA. V11 $2,999 CAD. X12.5 $5,999 CAD. 90-day trial.
The Salon Starter Kit bundles the V11 printer with cartridges and consumable stock at a $207 savings vs. buying separately. For mobile techs adding nail art to an existing mobile practice, the Mobile Pro Kit is the equivalent travel-bundle. Beyond the bundle, the only additional spend most salons make is a Flip LED Gel Light ($129) for curing — though many salons already have a curing light from existing gel manicure work.
How Do I Train My Technicians on a Nail Printer?
Every NailPrinter.ca order includes free onboarding training — a guided session walking your team through the first set, cartridge loading, and the design library — and most techs become independently competent after their first 5–10 client sets.
The good news: nail printers are easier to learn than free-hand nail art. The skill curve is mostly about consistent prep (clean, primed nail surface) and good positioning rather than hand-eye artistry. A tech who can do a competent gel manicure can become competent with the printer in a single shift. The free onboarding session covers the core workflow; the rest is reps. The how does a nail printer work guide and the official O'2Nails tutorials in the app library cover the rest.
How Should I Market the New Service to Existing Clients?
The highest-conversion launch sequence is a 30-day soft launch to existing clients before any external marketing: in-chair demos at next visit, a "first 50 sets at 30% off" intro pricing, before/after photos for social, and incentivized referrals — most salons book the printer to capacity within 30 days from existing clientele alone.
The mistake most salons make is launching publicly on day one. Existing clients are warmer, better-trained on you as a brand, and willing to be the early adopters who give honest feedback before the service hits Instagram. The 30-day rollout that works:
- Week 1 — Soft demo. Every existing client at their next visit gets a free demo print on a single accent nail. No pressure, no pitch — just "here's something new we're doing, want to see?"
- Week 2 — Intro pricing. Active offer to existing clients: "first 50 paid sets at 30% off." Generates real revenue and fills your before/after photo library.
- Week 3 — Social rollout. Post the best before/after sets on Instagram and TikTok. Tag the design names. Invite local referrals.
- Week 4 — External marketing. Now turn on Google ads, Instagram ads, or local partnerships. By this point you have proof, photos, and confidence pricing the service correctly.
What's a Realistic 30-Day Plan?
| Day | Action |
|---|---|
| Day 0 | Order printer + bundle. Open ROI calculator, plug in your numbers, save the screenshot. |
| Day 3–5 | Printer arrives. Schedule the free onboarding call. Designate the "art-set" chair. |
| Day 6 | Onboarding call (1 hour). Print test sets on press-on tips. Photograph results for portfolio. |
| Day 7 | Train the rest of the team — one shift, hands-on, real practice tips. |
| Day 8–14 | Soft demos to existing clients at their booked appointments. No charge, no pressure. |
| Day 15 | Open intro pricing — "first 50 sets at 30% off." Add the menu line at full price too. |
| Day 15–21 | Run the first 50 sets. Capture before/after photos for every one. |
| Day 22 | Post Instagram/TikTok rollout with the best work. |
| Day 23–30 | Local marketing — partnerships, Google profile updates, referral incentives. |
| Day 30+ | Review the numbers against the ROI calculator projection you saved on Day 0. |
What Could Go Wrong?
The three most common reasons a salon nail-art tier underperforms are: pricing too low (clients don't perceive premium value), no portfolio photos in the first 30 days, and one tech "owning" the printer instead of the whole team being trained.
- Pricing too low — A $15 upcharge for a 5-minute custom-printed design feels generous to you but reads as "low-end add-on" to clients. Test the standard $25/$55/$95 tiers first; adjust down only if you have actual conversion data.
- No before/after library — Without photos, you can't market the service externally. Every tech should photograph every printed set during the soft-launch period.
- Single-tech ownership — If only one tech can run the printer, you have a bottleneck the moment they're booked or off. Train the whole team in week one.
Why Buy Your Printer From NailPrinter.ca?
NailPrinter.ca is the only official O'2Nails distributor for Canada and the USA — CAD pricing, free shipping, a 1-year (12-month) full parts and labour warranty, a 90-day return window, free onboarding included, and salon-focused bundles built specifically for the service-tier launch use case.
The warranty covers full parts and labour for 12 months, repaired at no cost to you — cartridges and ink are consumables and are not covered, and accidental damage is not covered. The return window is 90 days, no questions asked, provided the machine comes back undamaged and complete; free trial-return shipping within Canada and the continental US. Full terms: return policy and warranty.
We focus on the salon and mobile-tech buyer, which means everything from the Salon Starter Kit bundle structure to the ROI calculator to the comparison guides on this site is built around the question "which printer makes my service-tier launch work best." Read the full O'2Nails Canada page for the lineup overview, or jump straight to the "are nail printers worth it" deep-dive if you're still in evaluation mode.
Frequently Asked Questions
How long before a named print add-on pays back the printer?
Do I need new training certifications to offer printed nail art?
Will my existing clients actually pay extra for printed nail art?
Can one printer handle a 5-chair salon?
What's the cost per printed set in consumables?
What if my clients don't take to it?
What is the return window if the printer is not a fit?
New salon-money and vendor guides
Only official O'2Nails distributor for Canada and the USA. Live prices: V11 $2,999 CAD, X12.5 $5,999 CAD, 90-day trial.
- How to make more money at a nail salon
- How to Make More Money at a Nail Salon
- 12 Ways to Increase Nail Salon Revenue
- Nail Salon Owner Salary
- How Much Do Nail Salon Owners Make
- 7 Strategies to Boost Nail Salon Profit Margins
- Is a Nail Salon Profitable
- How to Increase Nail Salon Profits
- 10 Ways to Make More Money as a Nail Tech
- How Much Do Nail Salon Owners Make Per Month
- How to Increase Nail Salon Revenue
- How much do nail salon owners make per month
- 7 strategies to boost nail salon profit margins
- How profitable is a nail salon
- Is a nail salon profitable
- 10 ways to make more money as a nail tech
- How to make more money as a nail tech
- Nail salon upsell scripts
- Official O'2Nails distributor
- What to ask a nail printer vendor
- Where to buy SM10 cartridges
- Salon growth hub